Language Settings
Language Settings allows the app owner to provide localization and personalization of plugin content. After enabling this feature, the plugin will have default strings on a new CP tab called Language. The app owner can override and save their values there.
The string values set there will automatically replace the language enabled content in the widget.
Language Tab Preview
App owners can keep the default language strings, or choose to override them and save their custom strings.

Usage
To enable this feature in your plugin, complete the following actions:
Update plugin.json file
Inside the control section in plugin.json add the language object:
language
| Name | Type | Required | Description |
|---|---|---|---|
enabled | boolean | yes | Enable or disable language tab. |
languageJsonPath | string | yes | Relative path of the languages.json file, must start with the resources folder. ex: "resources/languages.json". |
"control": {
    "content": {
      "enabled": true
    },
    "design": {
      "enabled": true
    },
    "settings": {
      "enabled": false
    },
    "language": {
      "enabled": true,
      "languageJsonPath": "resources/languages.json"
    }
  }
Create languages.json File
Create the languages.json file anywhere inside the resources folder, but it must be named languages.json to be detected. This file has the default strings of your plugin. The file structure must be a json object that contains sections, with each section containing labels. For example:
languages.json
{
  "mainInfo": "main info of language tab",
  "sections": {
    "YOUR_SECTION_KEY": {
      "title": "Your Title",
      "labels": {
        "YOUR_LABEL_KEY": {
          "title": "Section Title",
          "defaultValue": "Default Value"
        }
      }
    }
  }
}
| Name | Type | Required | Description | Default |
|---|---|---|---|---|
mainInfo | string | no | Main info for the language tab. | |
sections | object | yes | Object that has all sections. |
sections
| Name | Type | Required | Description | Default |
|---|---|---|---|---|
SECTION_KEY | object | yes | The key will be your own SECTION_KEY name. ex: playList. Will have all the section info. |
sections.<SECTION_KEY>
| Name | Type | Required | Description | Default |
|---|---|---|---|---|
title | string | yes | Section title that will be rendered on the CP side in the language tab. | |
info | string | no | Section info that will be rendered on the CP side in the language tab under the section title. | |
labels | object | yes | Object that has all labels inside one section. |
sections.<SECTION_KEY>.labels
| Name | Type | Required | Description | Default |
|---|---|---|---|---|
LABEL_KEY | object | yes | The key will be your own LABEL_KEY name. ex: goToPlayList. Will have all the label info. |
sections.<SECTION_KEY>.labels.<LABEL_KEY>
| Name | Type | Required | Description | Default |
|---|---|---|---|---|
title | string | yes | The label of the input field. | |
placeholder | string | no | Placeholder of the input field. | |
maxLength | number | no | Maximum Length of the input field, for text and textarea types only. By default, will be 200 for text fields, and 1000 for textarea fields. | Varies |
defaultValue | string | yes | Default value of the string. | |
required | boolean | no | Makes the input field required or not. (prevents empty content). | |
inputType | string | no | The type of the input field. Must be either text, textarea, or wysiwyg. By default, it will be text. | text |
toolTip | string | no | Add a tooltip on the label of the input field. |
{
  "mainInfo": "main info of language tab",
  "sections": {
    "playlist": {
      "title": "Audio Playlist",
      "info": "info string will be rendered under the title",
      "labels": {
        "goToPlaylist": {
            "title": "Go To Playlist Button",
            "placeholder": "Go to Playlist",
            "maxLength": 50,
            "defaultValue": "Go to Playlist",
            "required": true,
            "inputType": "textarea",
            "toolTip": "tool tip for the label"
        },
        "addToPlaylist": {
            "title": "Add To Playlist Button",
            "placeholder": "Add to Playlist",
            "maxLength": 50,
            "defaultValue": "Add to Playlist",
            "required": true,
            "inputType": "text"
        }
      }
    }
  }
}
If any errors are caught in the plugin.json language section, or there are any missing keys in languages.json, you will not be able to upload your plugin to the developer portal. It will throw a Language Settings validation failed error.
Enable Loading plugin.json
Add this meta tag in your index.html on the widget:
<meta name="buildfire" content="enablePluginJsonLoad">
If this tag was not attached before buildfire.js, you will not be able to use this feature properly.
Prepare Plugin For Translation
Mark element for translations
Add bfString attribute in each html element. The value will be SECTION_KEY.LABEL_KEY separated by dot. ex: bfString="playlist.playListName".
Before injecting the string value:
  <div bfString="playlist.goToPlaylist"> This content will be replaced by the injected string</div>
   <!-- the value of this label will be injected to this element as innerHtml >> "music" -->
After injecting the string value:
<div bfString="playlist.goToPlaylist">music</div>
Mark element attributes for translations
Keep bfString as mentioned above.
Add the bfString-attrs attribute that contains all targeted attributes. The attributes should be separated by a comma. ex: bfString-attrs="value,name,placeholder".
Before injecting the string value:
  <h2 bfString="playlist.goToPlaylist" bfString-attrs="title" title="I'm a header">keep this content</h2>
   <!-- The value of this label will be injected into the `title` attribute. innerHtml content will not be changed in this case. -->
After injecting the string value:
<h2 bfString="playlist.goToPlaylist" bfString-attrs="title" title="music">keep this content</h2>
More Examples
Before injecting the string value:
  <input bfString="playlist.goToPlaylist" bfString-attrs="value,placeholder"/>
   <!-- the value of this label will be injected into the `value` & `placeholder` attributes.
After injecting the string value:
<input bfString="playlist.goToPlaylist" bfString-attrs="value,placeholder" value="music" placeholder="music"/>
Important Notes
This feature has a background service that watches for any DOM changes in your plugin. Each html element that has the
bfStringattribute will be updated immediately.When using DOM manipulation (ex: creating html elements), make sure that the element has the
bfStringattribute before appending it to the DOM. So the steps should be:- Create the element.
- Set the
bfStringattribute. and setbfString-attrsif needed. - Attach the element to the DOM.
Expressions In Language Settings
The app owner can inject expressions in the language strings by using Expressions Builder. Each language input field will have a button at the end of the field that will open the Expressions Builder.
By default the Expressions Builder will get the language string value, then you can add, write or edit your expression.
You have to Evaluate your expression first to use it in the language input field.
Expressions Builder Preview
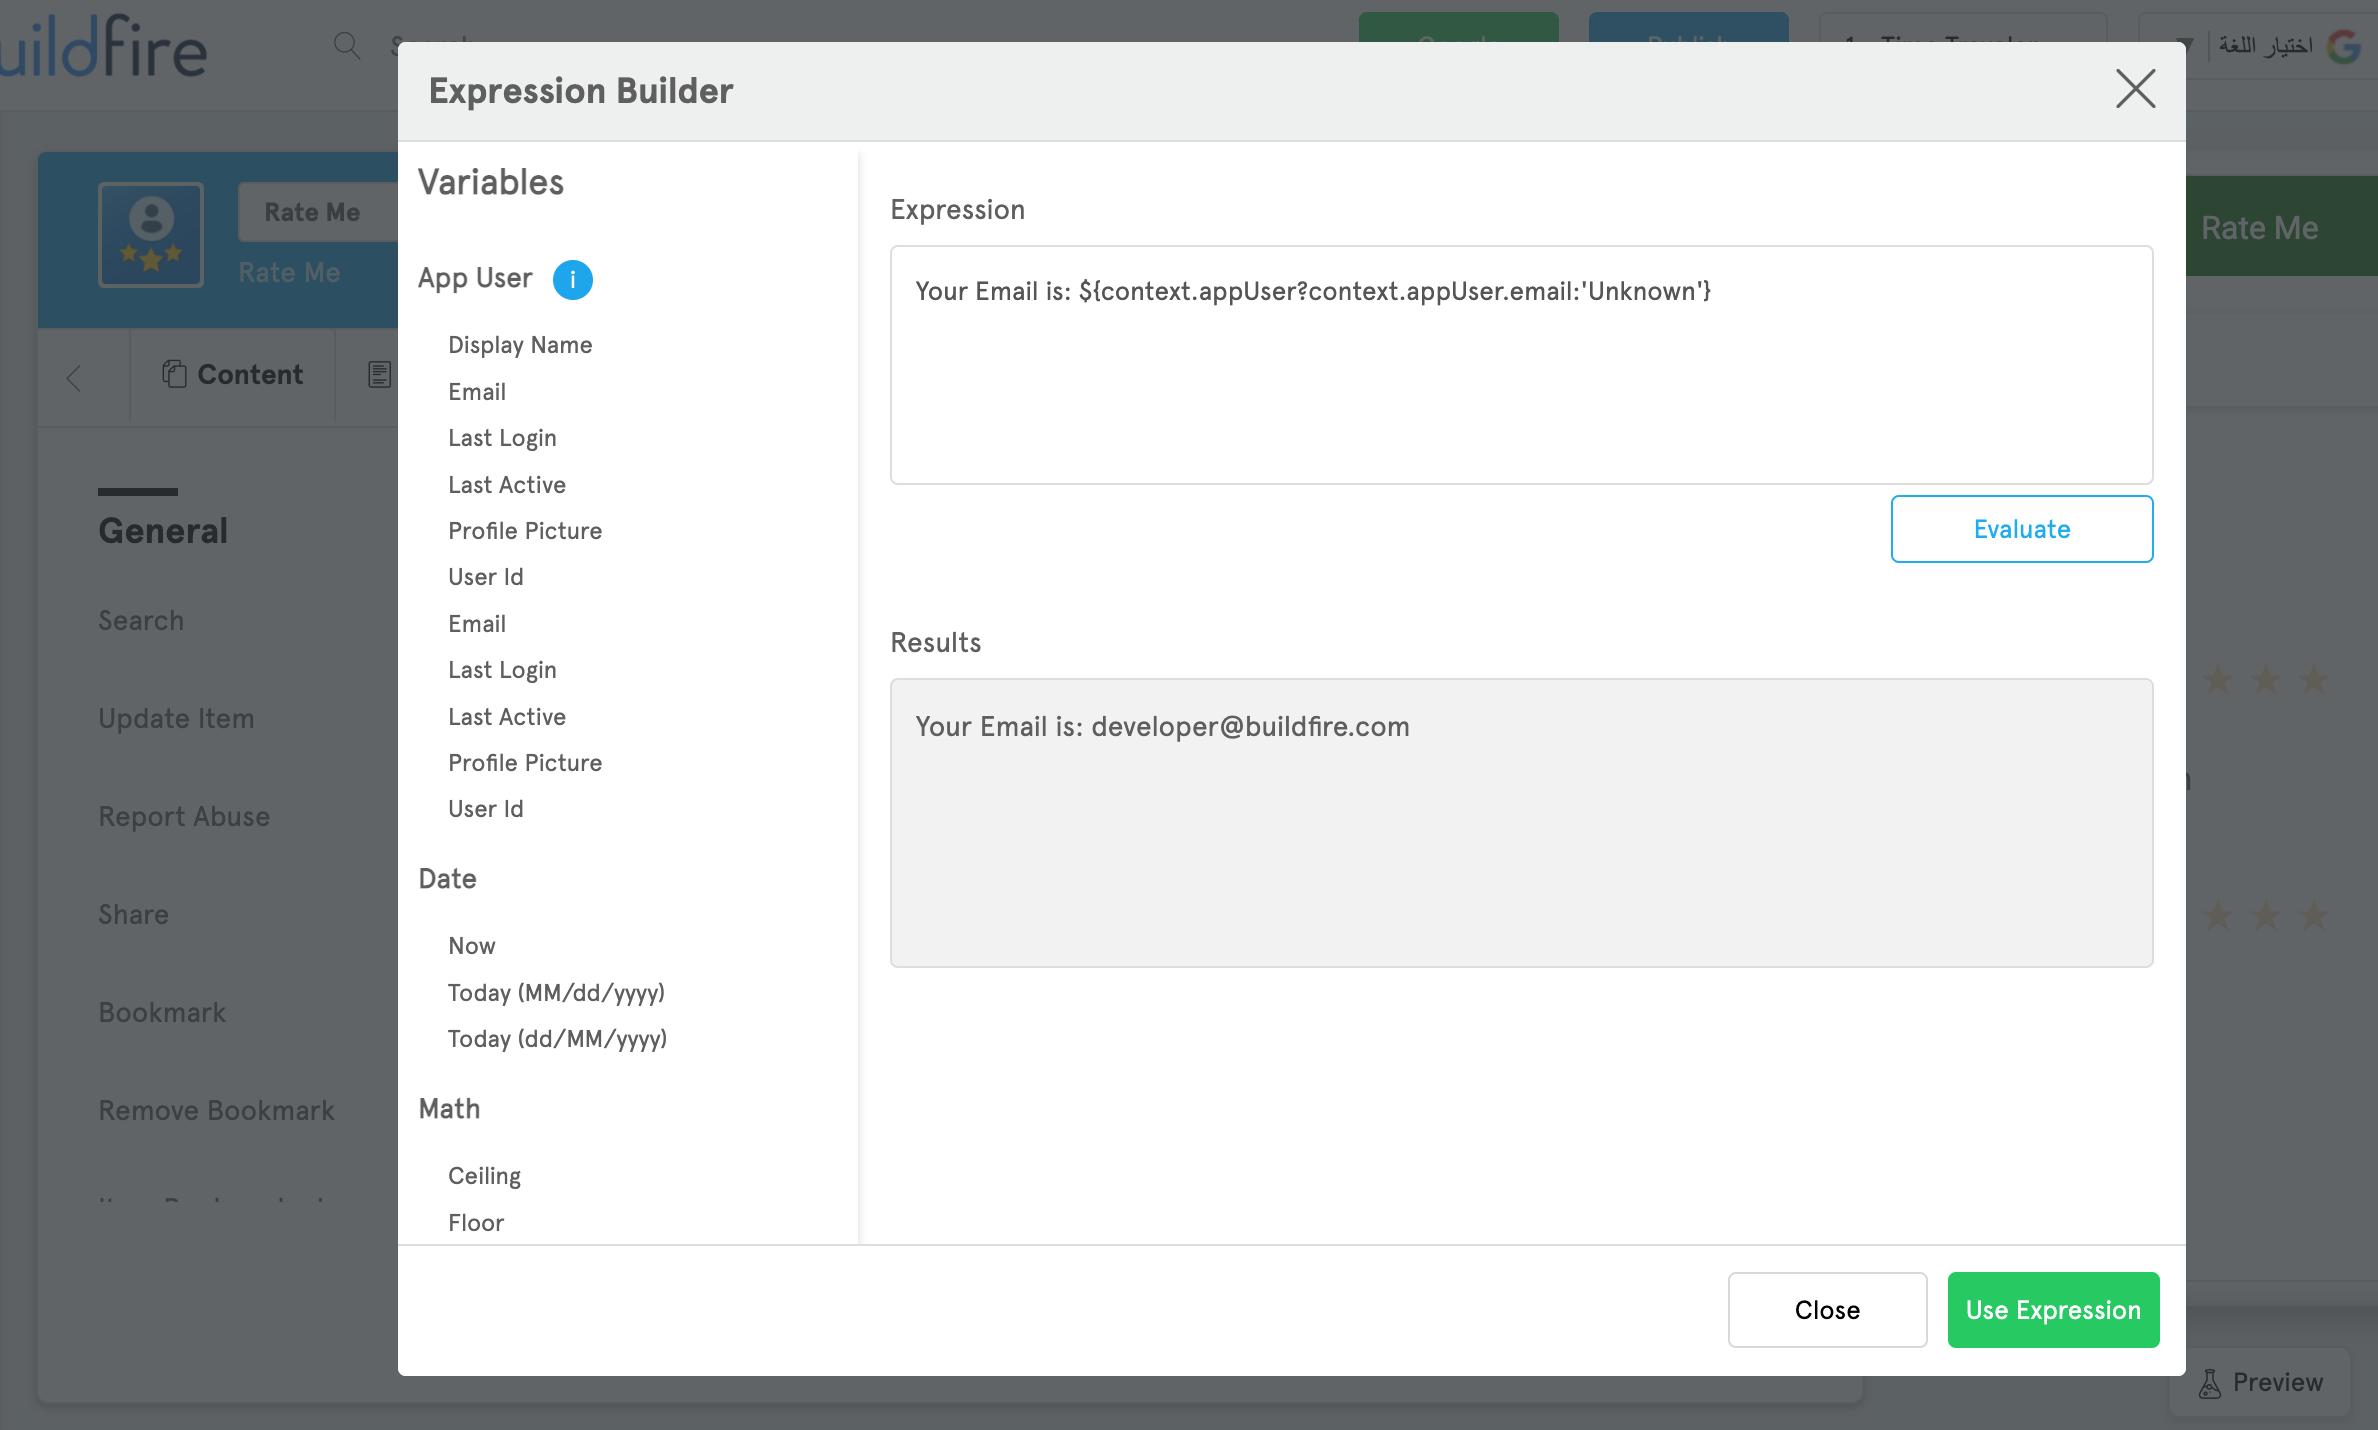
For the wysiwyg input field type, we are not injecting the language string value in Expressions Builder. Only the input and textarea types have this behavior, so you have to copy/paste it manually.
Methods
get()
buildfire.language.get(options, callback)
Calls the language API to retrieve the value for a LABEL_KEY inside a specific stringKey.
buildfire.language.get({stringKey: "playlist.goToPlaylist"}, (err, result) => {
  if (err) return console.error("Error while retrieving string value", err);
  console.log("String value", result); // "Go to Playlist"
});
options
| Name | Type | Required | Description | Default |
|---|---|---|---|---|
stringKey | string | yes | Key used to get string value from language strings, in the format of "<SECTION_KEY>.<LABEL_KEY>", ex: "playlist.goToPlaylist" | |
executeCallbackOnUpdate | boolean | no | Keeps you updated on each time the language string got changed by sending the new value to the same callback. If false, the callback will run only one time. | false |
callback function of get method will be executed each time that the language string value got updated. you can keep listening for callback executions to keep your values in plugin updates.
callback(err, result)
Callback function after the strings are fetched
| Name | Type | Description |
|---|---|---|
err | string | error string, null when the operation is successful |
result | string | Result string represents the value of that label inside that section. |
onStringsReady()
buildfire.language.onStringsReady(callback, allowMultipleHandlers)
Allows you to pass a callback function that is called once the language strings are ready and have been injected into the plugin html elements successfully. Use this method in the widget to be notified that your html templates got new strings. Returns a cleanup function to clear the listener.
let onStringsReady = buildfire.language.onStringsReady(() => {
  console.log("Strings are ready and have been injected");
}, true);

//When you want to stop listening
onStringsReady.clear();
callback
Function that gets called when the strings are injected.
allowMultipleHandlers
| Name | Type | Required | Description | Default |
|---|---|---|---|---|
allowMultipleHandlers | boolean | no | Tells the method to override all other handlers, or allow multiple handlers to exist at the same time. | false |