Firebase Integration
Getting Started
Prerequisites
Create a project on firebase console and register a new web app on it. If you already have project and web app created you can skip this step. Follow official documentation (Steps 1 - 3 are required) https://firebase.google.com/docs/web/setup
When adding a new web app to your firebase project you will get the
firebaseConfigobject andscripttags needed for your integration to work. Copy these scripts and add them to your widget or controlindex.htmlThis is the example html page generated from firebase.
<!-- The core Firebase JS SDK is always required and must be listed first -->
<script src="https://www.gstatic.com/firebasejs/8.4.3/firebase-app.js"></script>

<!-- We have two versions that are available locally for performance improvement -->
<!-- Firebase 7.9.3 -->
<script src="../../../../scripts/firebase/firebase@7/firebase-app.js"></script>
<!-- Firebase 9.16.0 -->
<script src="../../../../scripts/firebase/firebase@9/firebase-app.js"></script>
<!-- Or any other version from gstatic -->
<script src="https://www.gstatic.com/firebasejs/8.4.3/firebase-app.js"></script>

<!-- TODO: Add SDKs for Firebase products that you want to use
   https://firebase.google.com/docs/web/setup#available-libraries -->

<script>
  // Your web app's Firebase configuration
  var firebaseConfig = {
    apiKey: "API_KEY",
    authDomain: "PROJECT_ID.firebaseapp.com",
    databaseURL: "https://PROJECT_ID.firebaseio.com",
    projectId: "PROJECT_ID",
    storageBucket: "PROJECT_ID.appspot.com",
    messagingSenderId: "SENDER_ID",
    appId: "APP_ID",
    measurementId: "G-MEASUREMENT_ID",
  };
  // Initialize Firebase
  firebase.initializeApp(firebaseConfig);
</script>
Create a new service account on your project settings page. Go to Service accounts tab in your project ⚙ > Project Settings in top left part of side menu. Create a new Service Account and save the
jsonfile generated in a safe place. You will need this file later. You can follow official docs for this step too.
Firestore Database Integration
To integrate with Firestore Database continue with the following steps.
- Create a new firebase datastore. Go to Firestore Database on your project and click "Create Database" button. Finish the setup on displayed modal.
- Add a new integration on buildfire dev portal.
- Open Integrations page on buildfire dev portal.
- Press "Add New Integration" button.
- Select Firestore as a provider.
- Give your integration a name in Integration Name field. This can be any custom name you want.
- Enter a Provider Database Name. For Firestore this value can be found in url or in your firestore page
example-project-b39c5in the screenshot below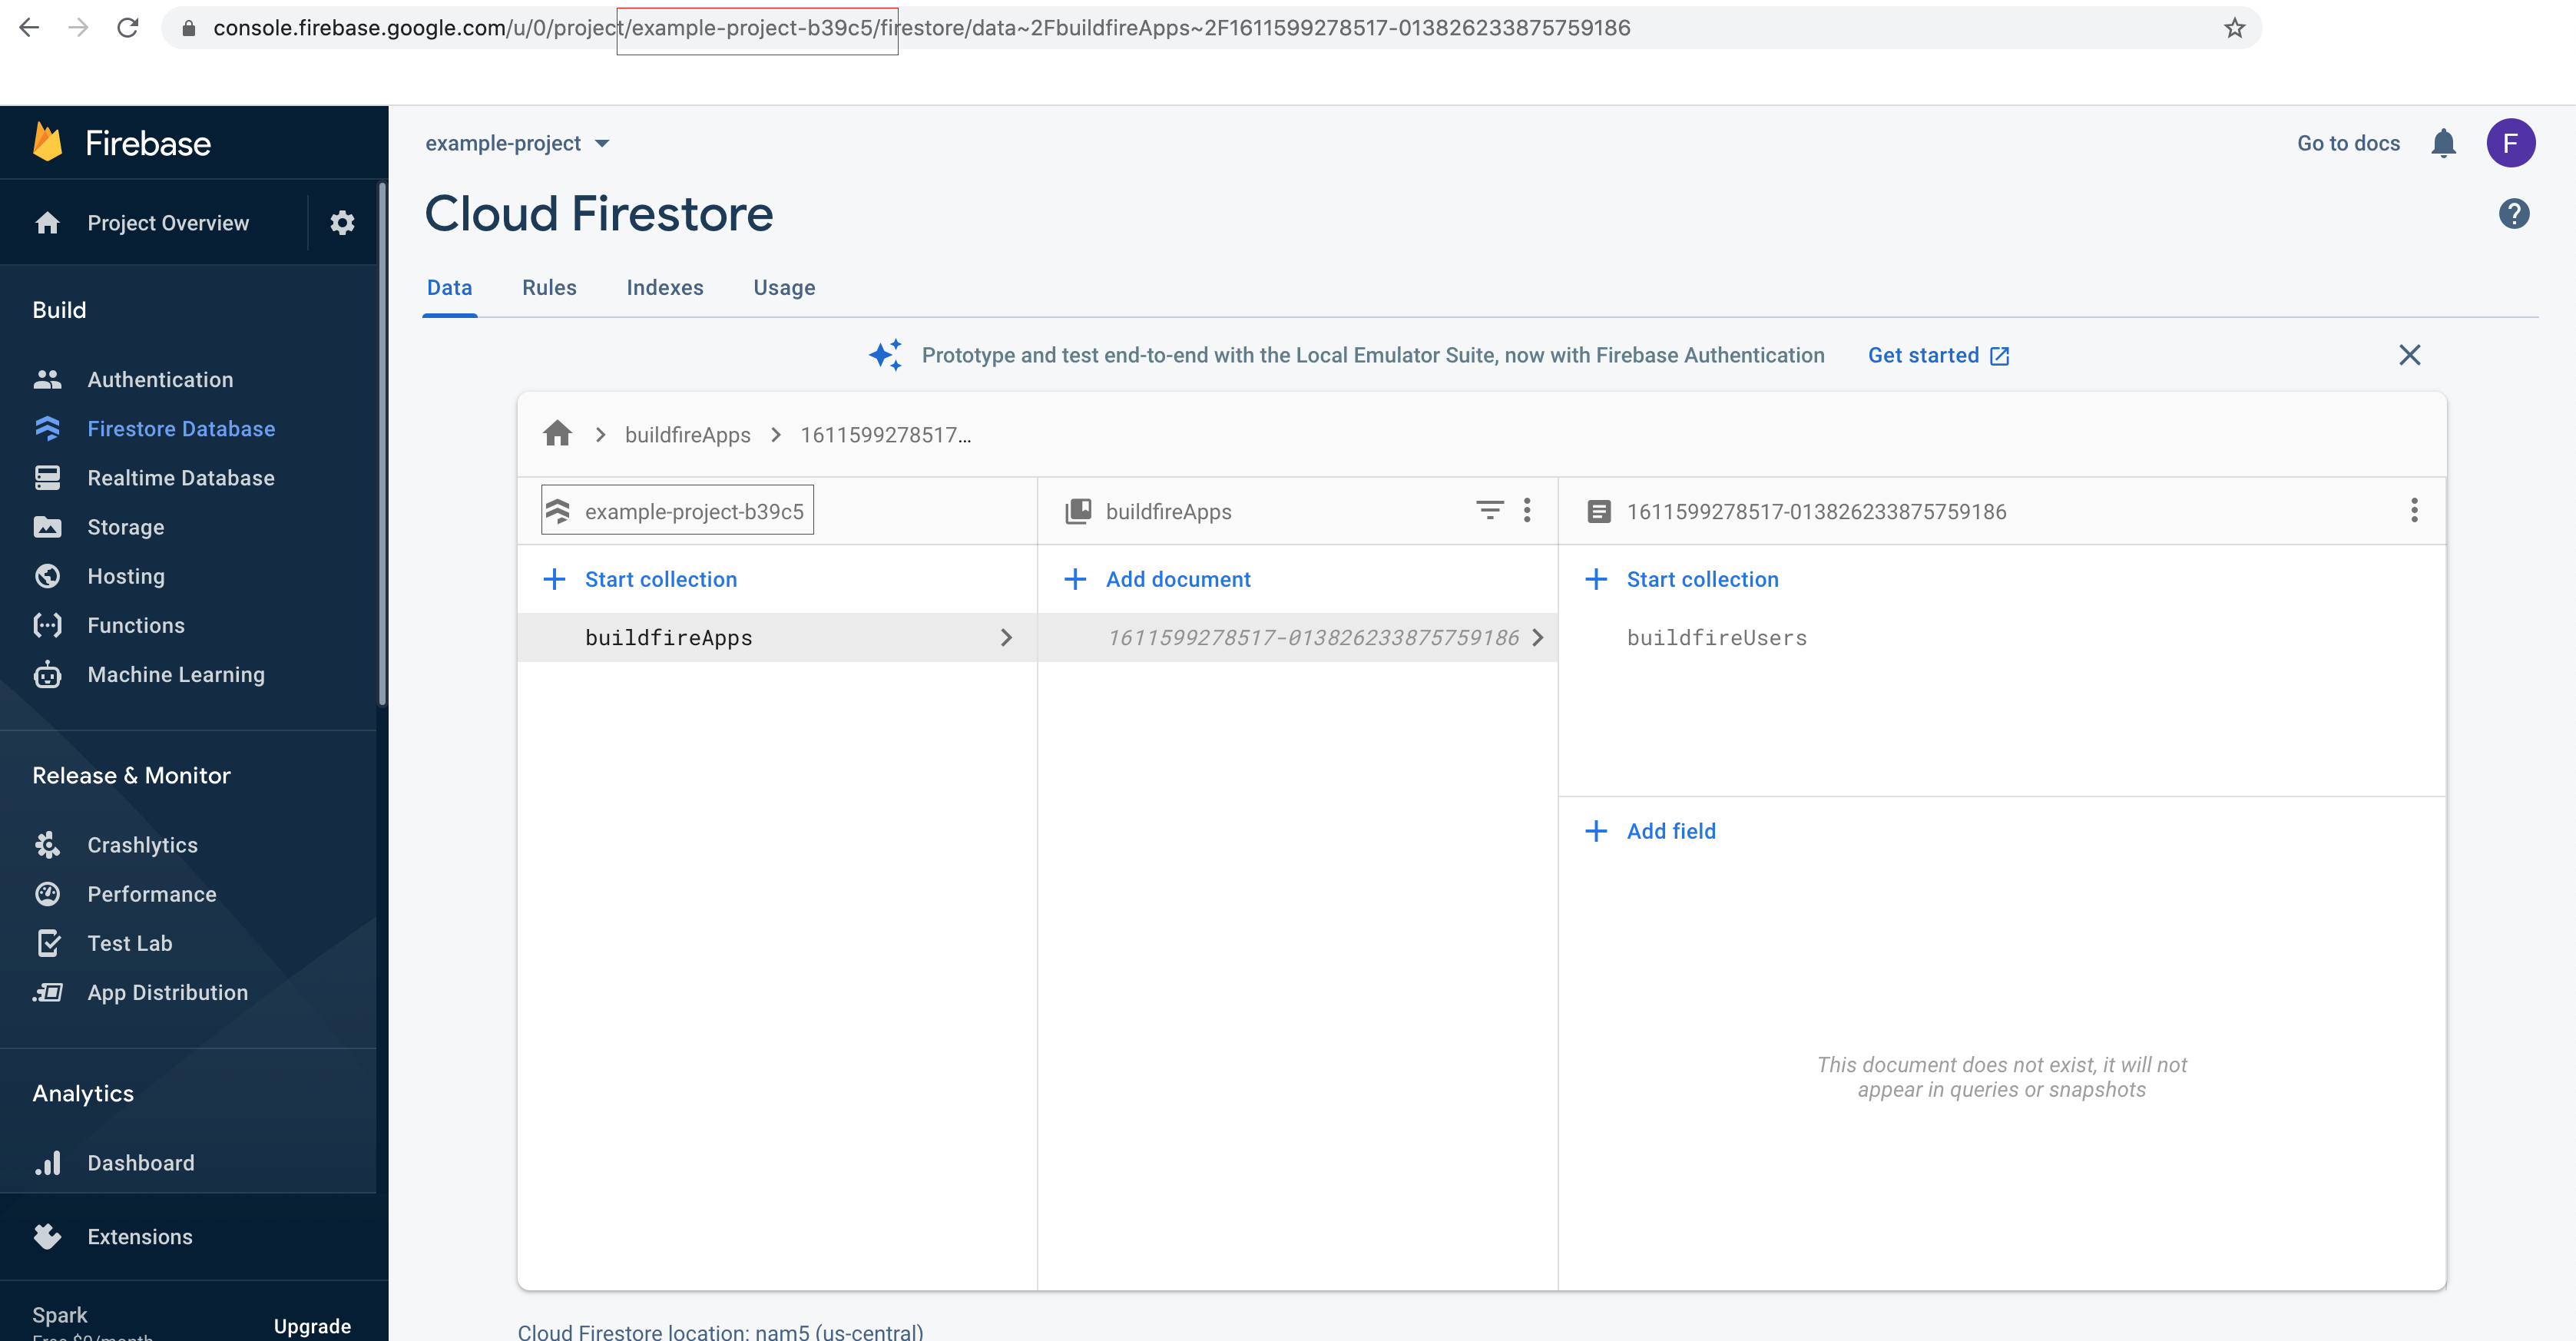
- If you want to use this integration on plugin tester on your localhost. Make sure to check "Development mode" checkbox
- Upload the Firebase service account file that you downloaded earlier while creating a service account
Your integration should be ready now and your integration token is visible on integrations page;
Realtime Database Integration
To integrate with Realtime Database continue with the following steps.
- Create a new realtime datastore. Go to RealTime Database on your project. Create a database and finish with rest of firebase steps.
- Add a new integration on buildfire dev portal.
- Open Integrations page on buildfire dev portal.
- Press "Add New Integration" button.
- Select Firebase Real Time as a provider
- Give your integration a name in Integration Name field. This can be any custom name you want.
- Enter a Provider Database Name. This is usually your project id and cab be found in url after
/project/ - Enter a Database Url. You can copy this from firebase realtime database dashobard. It looks something similar to this
https://example-project-b39c5-default-rtdb.firebaseio.com/; - If you want to use this integration on plugin tester on your localhost. Make sure to check "Development mode" checkbox
- Upload the Firebase service account file that you downloaded earlier while creating a service account
Your integration should be ready now and your integration token is visible on integrations page;
buildfire.services.firebase
Requirements
Widget
Include firebase.js file in widget header right after the buildfire.min.js
<head>
  <!-- ... -->
  <!-- Make sure to use the latest firebasejs version -->
   <script src="../../../scripts/firebase/firebase@7/firebase-app.js"></script>

  <script src="../../../scripts/buildfire.min.js"></script>
  <script src="../../../scripts/buildfire/services/firebase/firebase.js"></script>
</head>
Control
Include firebase.js file in control header right after the buildfire.min.js
<head>
  <!-- ... -->
  <!-- Make sure to use the latest firebasejs version -->
   <script src="../../../../scripts/firebase/firebase@7/firebase-app.js"></script>

  <script src="../../../../scripts/buildfire.min.js"></script>
  <script src="../../../../scripts/buildfire/services/firebase/firebase.js"></script>
</head>
If you are using Firebase from gstatic as source, make sure to include all firebase files needed. For example if you need auth you need to include <script src="https://www.gstatic.com/firebasejs/8.4.3/firebase-auth.js"></script>. You can see these requirements on official firebase docs.
Methods
createCustomToken()
buildfire.services.firebase.createCustomToken(options, callback)
Used for Firebase custom login. This will integrate on the server-side to create an authenticated custom token on firebase. It will also port over a buildfire user record to your database. You can use this token to sign in using firebase.auth().signInWithCustomToken(token). See more here
buildfire.services.firebase.createCustomToken(
  { integrationToken: "Your Integration token" },
  (err, data) => {
    if (err) return console.error(err);

    if (data) console.log("Firebase token", data.token);
  }
);
options
| Name | Type | Required | Description | Default |
|---|---|---|---|---|
integrationToken | string | yes | Your integration token obtained from [dev portaldev.buildfire.com | |
forceLogin | boolean | no | Will force cached users to login again to firebase | false |
callback(err, data)
Callback function after create custom token is completed. Data contains a token property, which is the custom token gererated by firebase.
| Name | Type | Description |
|---|---|---|
err | string | error string, null when operation is successful |
data | object | Response object containing token |
getRootPath()
buildfire.services.firebase.getRootPath(options, callback)
Used to return the root path for collections to use this path where you can build your collections for the current appId.
buildfire.services.firebase.getRootPath(
  { scope: "instance" },
  (err, rootPath) => {
    if (err) return console.error(err);

    console.log("Root firebase path", rootPath);
  }
);
options
| Name | Type | Required | Description | Default |
|---|---|---|---|---|
scope | string | yes | Scope of the data being saved. Can be one of the following: app - All data will be available across app on all plugins. plugin - Data will be available across app on instances of current plugin. instance - Data will be available on current instance only |
callback(err, rootPath)
Callback function after getting the root path
| Name | Type | Description |
|---|---|---|
err | string | error string, null when operation is successful |
rootPath | string | Root path for the firebase collections |
getCollectionPath()
buildfire.services.firebase.getCollectionPath(options, callback)
Used to return the collection path for collection name to use this path where you can save data in the specified scope.
buildfire.services.firebase.getCollectionPath(
  { scope: "instance", collectionName: "cities" },
  (err, collectionPath) => {
    if (err) return console.error(err);
    //access your data from the collection path
  }
);
options
| Name | Type | Required | Description | Default |
|---|---|---|---|---|
scope | string | yes | Scope of the data being saved. Can be one of the following: app - All data will be available across app on all plugins. plugin - Data will be available across app on instances of current plugin. instance - Data will be available on current instance only | |
collectionName | string | yes | Name of the collection |
callback(err, collectionPath)
| Name | Type | Description |
|---|---|---|
err | string | error string, null when operation is successful |
collectionPath | string | Collection path |